In this post I will show you how to build a fun candy catapult!
This project requires basic woodworking skills,
so parents help your kids!
The first step is gathering all the needed components,
tools and materials.

You will need the following pieces of wood (all of them have a profile of 48mm*24mm):
- 4x 44cm (base frame)
- 4x 30cm (base frame’s legs)
- 4x 22cm (base frame’s struts)
- 1x 17cm (lever stopper)
- 1x 64cm (catapult lever)
- 1x 67cm (trigger)
- 1x 20cm*20cm (flat, target)
- 1x 2cm or 1x wooden screw
In addition the catapult requires two metal rods of any common diameter (about 3mm – 8mm) acting as the lever’s and trigger’s axles. I used threaded rods and IKEA stabilizing crosses, both worked fine!
For playing and throwing a tennis ball or
hacky sack does the trick.
Last but defenitely not least, you’ll find yourself in need of a powersource for your catapult. A strong elastic rubber band should do the trick, mine came with plastic hooks on both ends:

Without tension it is about 50cm long.
With the help of wooden screws and predrilled holes, you should be able to set up the baseframe accordingly:

If you need more help take a look into the video tutorial here.
Add the last wooden beam at the bottom
(yellow in the picture below):

Drill holes at a height of XXcms from the bottom into all corners. These will hold the two axles.
Two bigger holes in the middle (yellow) and in one bottom(turquoise) beam will hold the rubber band’s hooks:

Take the trigger arm and drill a hole into its side at a height of 21 cm from the bottom. Add a 2cm wooden piece at a height of 27 cm to the flat side. You could also use a wooden screw for this purpose. This piece will lock together with the catapult lever and hold it in place while the catapult is under tension.

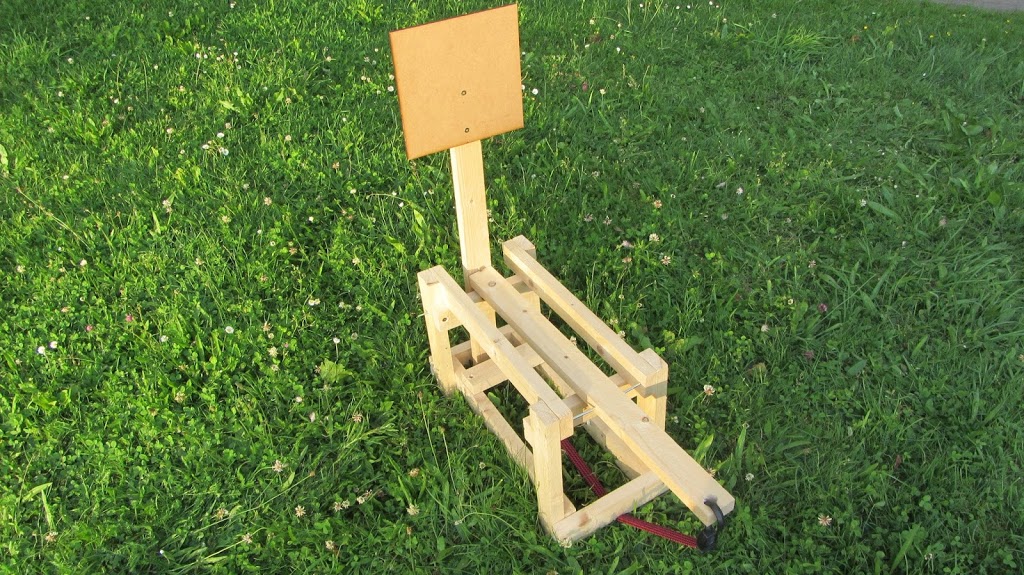
Add the square wooden plate to its top and you’re target and trigger arm are done!
Another hole in the catapult lever through its side at a height of 25cm from the bottom will hold the axle. Don’t forget another bigger hole at its bottom through the flat side for the rubber band’s hook:

Slide the axles through the sides together with the catapult lever and trigger – hook the rubberband to the catapult arm and depending on the catapult’s strength either middle or bottom hole at the frame’s back and you’re done!

Arming the catapult is pretty simple:
Press down the catapult lever and push the trigger flat against it hooking it in place with the help of the little wooden piece or screw. There’s also an animation in the video.
If you’d like a portable version, drill another hole through the frames side. Using the removable axles you can pack everything tightly together:

A little bit of spraypaint transforms this into a real beauty:

Now put some candy on the the levers top and start throwing at the trigger with a little tennis ball or hacky sack!
Of course there’s no limit to what ammo you use – sweets, jelly shots and gummy bears – there’s something for every generation! Now have fun and watch the video if you still have questions about details!
http://www.doityourselfgadgets.com